
SEVEN DAY CYCLIST
CYCLING, BUT NOT USUALLY RACING
LATEST UPDATE July 8 2026
HOW DO WE REACH THE OVERALL RATINGS FOR PRODUCTS WE REVIEW?
THIS SITE USES GOOGLE ANALYTICS TO ANALYSE TRAFFIC. CONTINUING TO USE THIS SITE MEANS YOU ACCEPT THE USE OF COOKIES.WE DO NOT COLLECT PERSONAL DATA LEARN MORE OR SEE OUR PRIVACY POLICY
TWO TONE MAKEOVER
LONG-TERM TEST: MALDON SHOT BLASTING & POWDER COATING

Back in October 2015, after almost ten years loyal, four seasons’ service, Michael Stenning's winter/training fixie’s chainstays were looking very scabby. Wet, salty stuff had snuck behind some superficial looking stone chip in the factory finish, causing it to bubble and blister as surface corrosion began to bite. My long suffering, though much loved, friend had more than earned its keep, so deserved a makeover.

Decisions, Decisions
I wanted to select a new colour before performing a full on strip and detailed inspection. I have nothing against wet spray finishes per se but prefer powder coating, which is kinder to the environment and arguably a much tougher option than stove enamels or 2pac.
Blue or teal were a thought, or maybe pale/dove grey? Bottom line, I couldn’t choose between them and wondered if Maldon Shot Blasting & Powder Coating would consider performing a two-tone blue/grey makeover.
Traditionally, powder coating is a single colour finish. Multiple colours are possible but usually achieved by masking the powder base coat at various points, then applying a second colour using wet spray 2pac. However, some months earlier, I spotted Chris successfully achieving a two tone effect on a set of Kawasaki motorcycle wheels ....
Proposals
Having emailed Trevor along the lines of “Arrgh! One of my favourite frames has succumbed to the salt monster, so desperately needs a re-spray”; I discussed my two-tone yearnings. In principle and because he knew I wouldn’t try cajoling them into doing something they felt uncomfortable with; he gave my project the nod and told me to drop it down.
Preparation
Stripping the bike wasn’t an issue. Everything was well greased, and the frame treated internally with oceans of home brewed corrosion inhibitor, so released effortlessly. This had also kept Mother Nature out. Trevor, Graham and Chris were flat out, so the frame slept in their storage room. Two weeks later, they called me in to discuss and document the transformation. I didn’t need to be asked twice, loaded SLR bag and lenses into the car and headed off to their HQ.
The Usual Drill

First step was to dunk it in the methyl chloride tank and leave marinating for 15 minutes.

Donning huge rubber gauntlet gloves, Chris scoops my frame from the gunk. Pretty much all the original paint has shrivelled up and peeled away, so it’s off to the iron oxide cabinet.

Several minutes blasting later, it emerges clean and with that lightly etched surface, perfect for keying the zinc-rich epoxy primer.


Much as we suspected, there has been some very light pitting where the salt monster has licked the chainstays. Chris treats this to some light, remedial sanding. Left untreated, these pock marks could show in the final finish.
Tales of the Unexpected
Graham joins us, since he volunteered to undertake the makeover. Pleasantries shared, he assesses the job and my requirements. Much to my astonishment, he suggests forgoing the corrosion inhibiting zinc layer. He says the two layers of powder AND a clear coat lacquer might be too much ....
Having noted I’m turning a shade of green and shuffling uncomfortably at the very suggestion, he listens while I explain said bike serves year round, come hell and sometimes high water.
I can almost feel his mind whirring for a moment. Then he suggests a compromise- applying a slightly thinner zinc primer coat.
Primer applied and cured at 150 degrees for 15 minutes, we’re on to the first colour coat - I’ve gone for a 5024 (French Blue) and a complimentary grey for the rear triangle.
Graham explains that a very subtle fade effect would be a better bet. Solid blocks demand masking, which ultimately results in undesirable “Tan lines”.
I’ve no issues with this proposition, so he works seamlessly around the main triangle, checks for even coverage, then sends it through the curing oven for another 15 minutes. Conversation turns to the frame, how I came to acquire it, what makes it special to me etc.


Opening the doors, we weren’t entirely surprised to find gallons of hot black gloop gushing from one of the breathe holes.

Luckily, Chris and Graham are very good humoured. This only tainted their concrete floor, not the new finish, so Graham blasts the frame through with compressed air, cleans the powder gun and wrestles a big vat of grey powder stag-beetle style across the workshop.
Gun loaded with grey, he takes three attempts with the rear triangle, repositioning powder at key points before he’s prepared to oven cure it.


Having cured, he applies an acrylic clear coat for the last word in protection.

Maldon Shot Blasting & Powder Coating offer a five year warranty, provided you’ve played fair, washed frame and/or components periodically, not leaving them caked in salt, mud and ingrained grot for months on end.
Long term, real world …

With warranty in mind, I wasn’t surprised to discover the finish looking pretty much oven fresh after nearly two years regular service and harsh, wet winters.

Seven Day Cyclist regularly gets waxes and space-age frame preserves for testing, so I’ve often deliberately left salty spatter around the bottom bracket shell, down tubes and chainstay areas for several weeks at a time.


Aside from salty, waterlogged backwaters; the bikes’ ‘cross genetics and lofty bottom bracket mean I’ve frequently gone the 32-35mm knobbly route for some moderate forest trail and fire road fun.
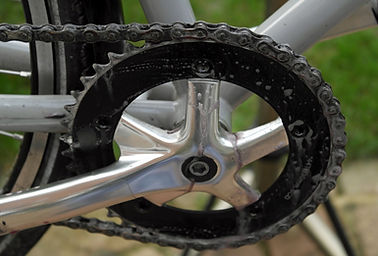

No hint of chips, dings or scratches, despite stray stones scoring direct hits-the same goes for loose chippings synonymous with freshly resurfaced summer roads.
All paints, regardless of their origins require some form of periodic nourishment and as I said earlier, I’ve treated this frame to assorted washes cum waxes and space age polymer stuff.
Look really (I mean obsessively) closely, you’ll notice the odd miniscule graze in the top coat and some tan lines along the top tube left by webbed high power li-on battery packs.


Ultimately, you’d need to be peering at nose level to spot any imperfections, so nothing that I’d lose any sleep over and I’m notoriously neurotic when it comes to livery.
Bottom Lines
Cost-wise, bargain on £130 upwards, given the time and preparation required.
Arguably this is OTT for an off the peg, TIG welded, 4130 frame with a retail price tag around £200. At face, economic value, I’d go for a plain colour (£65 inc VAT) and reserve this kind of work for more exotic tubesets. That said; I love my MK2 Ilpompino, the new livery is exactly what I wanted and extremely durable.
Verdict: 5/5 Beautifully executed and extremely durable paintwork backed by a 5 year warrantee. Highly recommended for metal frames due a re-spray.
Michael Stenning
http://www.ctc-powder-coating.co.uk/
PUBLISHED MAY 2017


